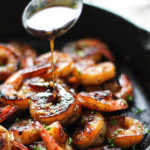
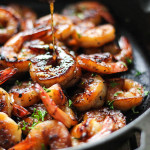
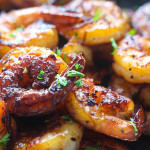
Try out the much-loved sauce with over 2 million shares. This sweet and savory honey garlic shrimp skillet is super easy with only FIVE ingredients and cooks in less than 15 minutes!
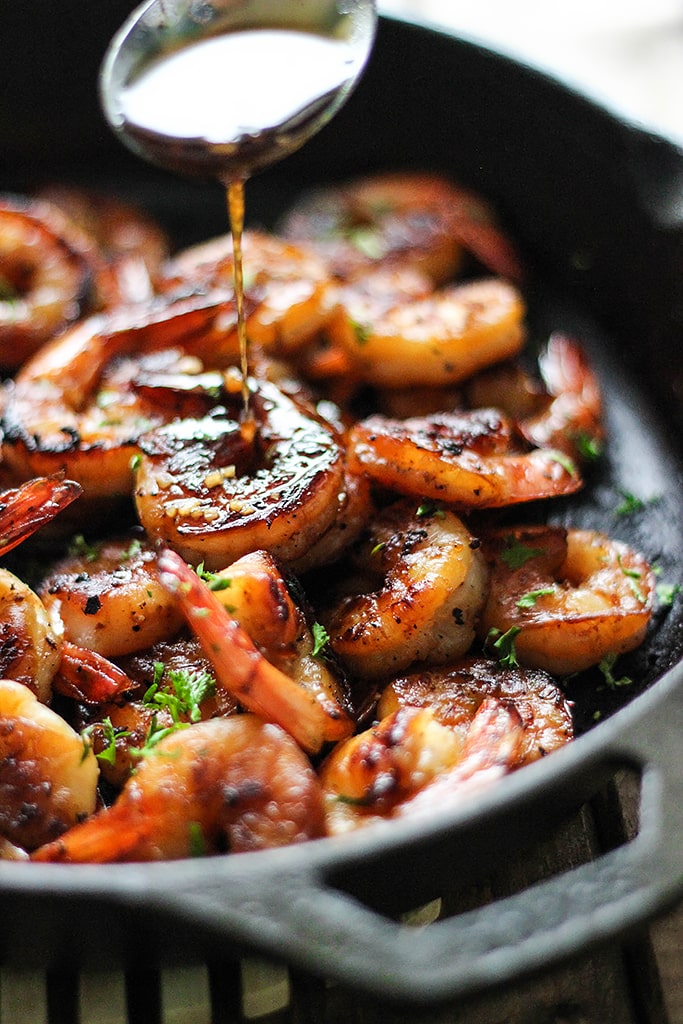
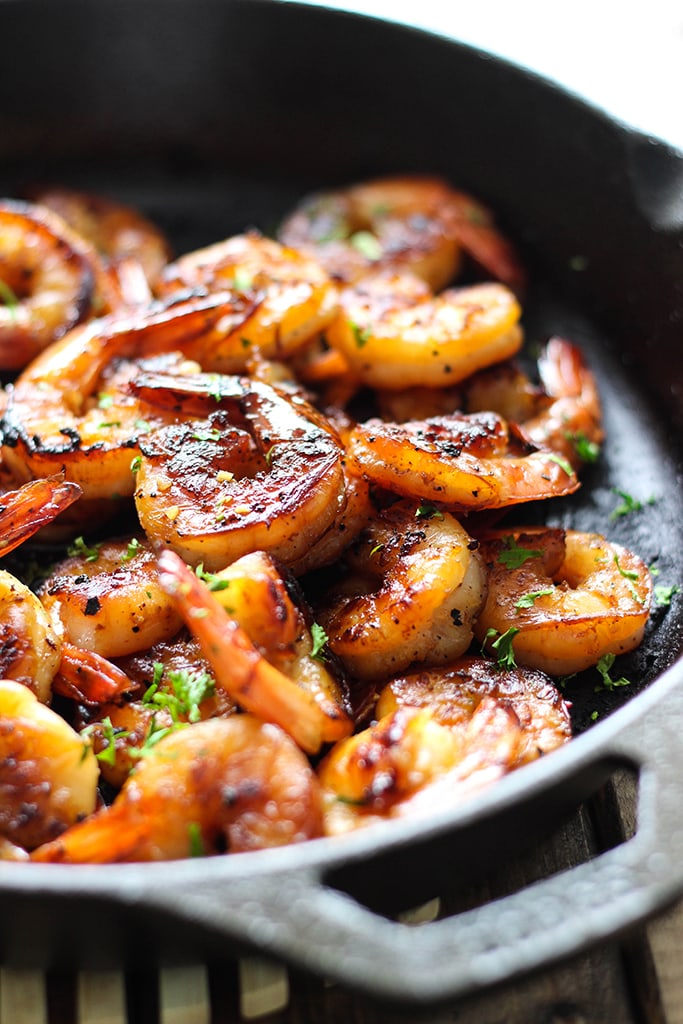
Today we’re making some honey garlic shrimp skillet which is a reader favorite and one of the more popular recipes on the blog. It’s so easy to make but delivers big on flavor despite its simplicity. All you need are shrimp, garlic, ginger, soy sauce and honey to make this quick and easy recipe. These five ingredients reward you with a sweet and savory flavor combo and delicious caramelized bits of honey and garlic.
It’s a great, fast fix for a quick weeknight meal paired with a side of veggies and some rice, or on a bed of pasta/noodles. And if you’re not a fan of shrimp but just love the honey garlic sauce, try making some honey garlic chicken or the much-improved honey garlic butter chicken instead. Or if you prefer seafood, try this honey garlic salmon or the 7-minute air fryer honey garlic salmon. There are many, many ways to enjoy this sauce! So let’s start cooking.
How To Make Honey Garlic Shrimp Skillet (1 Min Video)
HONEY GARLIC SHRIMP SKILLET RECIPE TIPS
- Shrimp – I used jumbo, peeled and deveined shrimp with tails on because they just tend to look better in pictures. However, you can use whatever kind of uncooked shrimp you like: peeled and deveined with tails off or unpeeled shrimp.
Recipe Notes:
If you use frozen shrimp, make sure to thaw it out beforehand and pat it dry so the sauce isn’t diluted. You could technically use a bag of cooked shrimp with this recipe, just cut the cooking time to where you’re basically just reheating up the cooked shrimp in the pan and tossing it in with the sauce.
- Sauce – Combine the ingredients for the sauce then divide it in half. One part is for the marinade and the other is for the finishing drizzle. This recipe does not yield much sauce so if you want it super saucy, add an extra tablespoon of honey and soy sauce. Or you could double it and thicken it with some cornstarch slurry later.
- Soy sauce – I used reduced-sodium soy sauce for this recipe and my go-to brand is La Choy. If you want to make honey garlic shrimp without soy sauce, you could try using tamari instead.
- Garlic – You can use fresh garlic or garlic powder, whichever you have on hand, and whatever is easier for you. If substituting to garlic powder, try using 1/2 teaspoon to start.
- Ginger – Ginger gives the sauce a warm, peppery taste but if you don’t like ginger, you can leave it out. Most households don’t keep ginger as a pantry staple so an easier way to do this is to buy ginger paste in a tube. It keeps well in the fridge and is easy to use. I used Gourmet Garden’s ginger paste for this recipe.
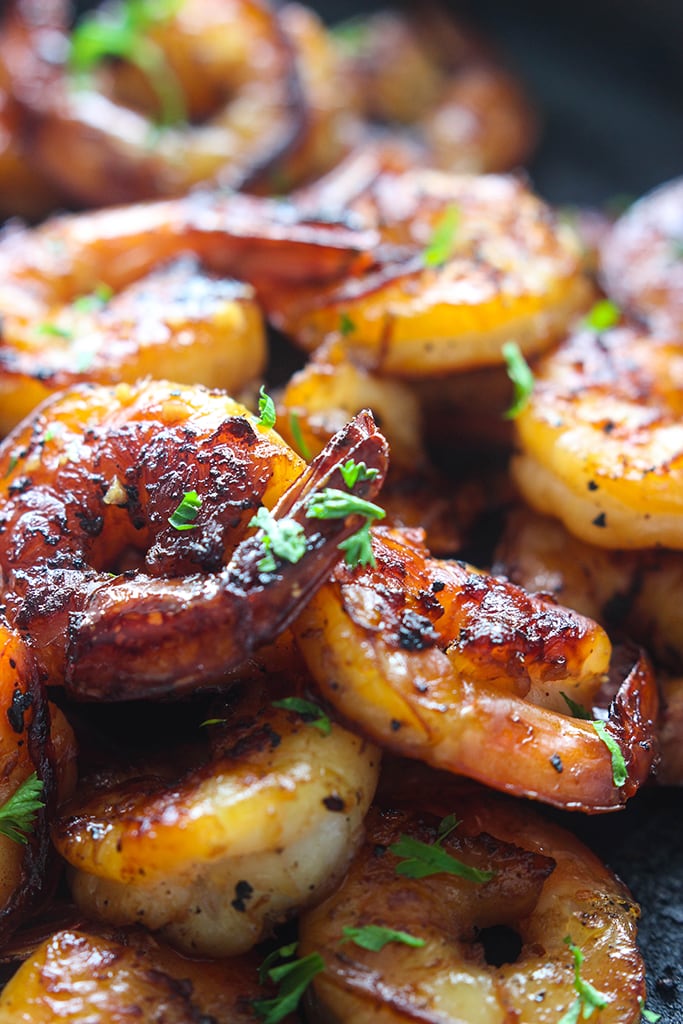
- Searing – Shrimp tends to cook quickly so you’ll want to get your pan nice and hot before starting so they have a gorgeous sear. One to two minutes per side and your shrimp is cooked! You know the shrimp is cooked when the color changes from translucent to opaque (see-through gray to solid pink). You’ll know the shrimp is overcooked when it starts to shrink in size into a tight C-shape and is rubbery.
Recipe Notes:
If you’re using a 10″ skillet, try searing in batches of two so you don’t overcrowd the pan. If the shrimp are too close together, the heat buildup between them will steam them instead of searing them.
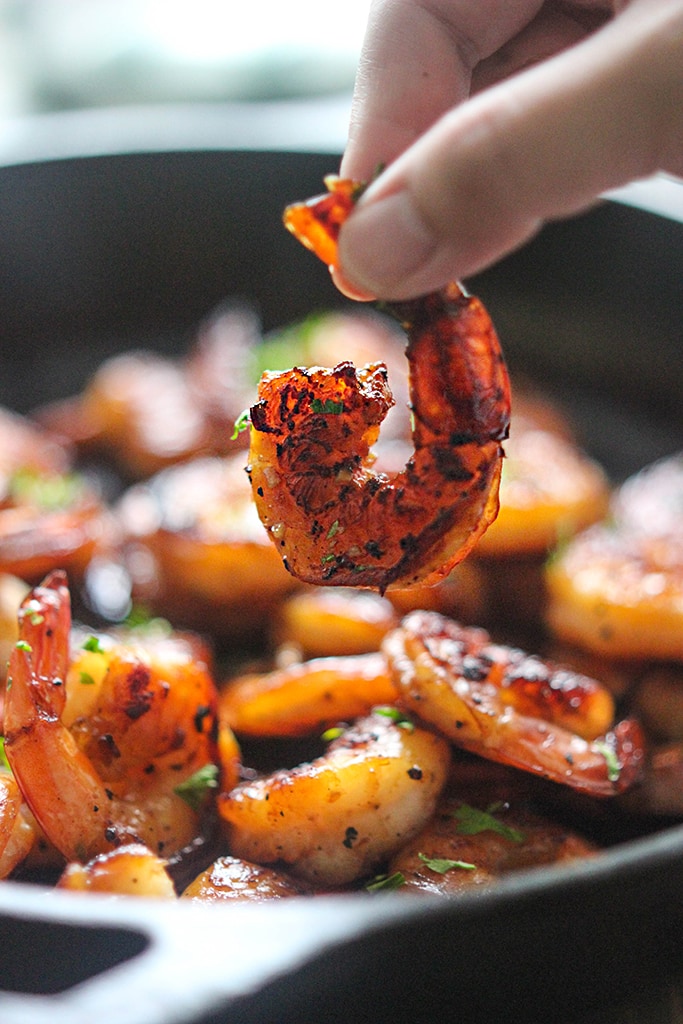
- Sticky bits – The honey will caramelize a little and browned bits will get stuck to the bottom of the pan. There will be more stuck-on bits in a cast iron pan vs a non-stick pan but you should still see some on a non-stick. Use tongs and gently rub the shrimp into the stuck-on bits to get them nice and blackened. Here’s where you get the smoky aftertaste.
- Thickening the sauce – You can thicken the leftover drizzled sauce with a cornstarch slurry or if you prefer even more sauce, double the sauce, then use the cornstarch slurry.
Customize It!
- Add more flavor – Add some heat with a few dashes of red pepper flakes. You can cut the sweetness of the sauce with some apple cider vinegar or a drizzle of lime juice. For a smoky flavor, do a finishing drizzle with sesame oil or sprinkle with toasted sesame seeds.
- Garnish – Garnish with some freshly chopped parsley or green onions.
What to Serve with Honey Garlic Shrimp
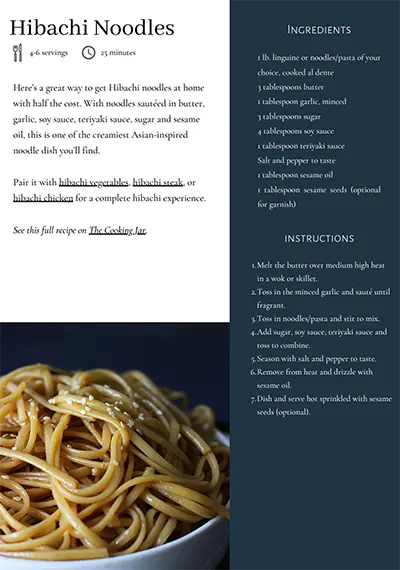
Serve your honey garlic shrimp with some white rice or coconut rice and some greens on the side like broccoli, green beans, or some asparagus. You can also serve it over some mashed potatoes or mashed cauliflower. It also goes great with noodles like these buttery Hibachi noodles.
And that’s about it. Let me know how you liked it, what substitutions you made, or what you paired it with in the comments below.
MORE SHRIMP RECIPES TO TRY
- Cilantro Lime Honey Garlic Shrimp
- Lemon Garlic Butter Baked Shrimp
- Easy Shrimp Scampi
- Browned Butter Shrimp
- Creamy Garlic Tuscan Shrimp
Did you make this recipe? Rate it!
♡ If you liked this recipe, giving it a star rating ★★★★★ in the comments below really helps! For more recipes, subscribe to my newsletter or follow me on Facebook, Instagram and Pinterest.
Honey Garlic Shrimp Skillet
- Total Time: 15 minutes
- Yield: 4 1x
Description
Try out the much-loved sauce with over 2 million shares. This sweet and savory honey garlic shrimp skillet is super easy with only FIVE ingredients and cooks in less than 15 minutes!
Ingredients
- 1 lb. jumbo or large raw shrimp, peeled and deveined
SAUCE
- 2 medium garlic cloves, minced / 2 teaspoons garlic, minced
- 1/2 teaspoon fresh ginger, minced (optional)
- 4 tablespoons honey
- 3 tablespoons reduced-sodium soy sauce
Instructions
- Combine the sauce ingredients and divide the sauce in half.
- Marinate the shrimp with one-half of the sauce for 15-30 minutes. Discard marinade.
- Over medium-high heat in a skillet, pan-sear the shrimp in some oil. Sear them on both sides until cooked, about 1-2 minutes per side.
- Dish and serve hot, drizzled with the remaining sauce and fresh parsley or green onions as an optional garnish.
- Enjoy!
Notes
- Rubbing the shrimp onto the stuck on bits (fond) blackens the shrimp and gives it a charred look and smoky taste.
- This recipe sears better in a cast iron pan and may not perform as well with caramelized bits in non-stick pans.
- Add more flavor – Add some heat with a few dashes of red pepper flakes. You can cut the sweetness of the sauce with some apple cider vinegar or a drizzle of lime juice. For a smoky flavor, do a finishing drizzle with sesame oil or sprinkle with toasted sesame seeds.
- Garnish – Garnish with some freshly chopped parsley or green onions.
- Scroll up to RECIPE TIPS for more useful tips, suggestions and ingredient substitutions.
- Prep Time: 5 mins
- Cook Time: 10 mins


Comments & Reviews
Delish!!! Made this tonight. I made a double batch of the sauce and heated and drizzled on the shrimp as suggested. I made about 1.5 #’s of shrimp. Thank you for sharing!!!
Great to hear! Thanks for trying it out, Shari. Always appreciate some feedback.
I’m sorry…but this was awful.
Sorry to hear it didn’t work out for you, Kev. What didn’t you like about it?
This was SO delicious!! Thank you so much for sharing. I did squeeze some lemon juice on top, and it was well worth it. I also paired this dish with some steamed asparagus. Definitely will be making this again.
Appreciate it, Sydney! I love salmon with asparagus, it works so well. And lemon juice gives it a nice touch for those that like that kind of flavor.
Just made your sauce!! I only had the smaller shrimp and a bigger crowd, I dusted them with corn starch and fired up in smaller btaches, made 3 times the sauce and tossed it together. Big hit with the family!!!
Wonderful idea with the cornstarch to give it some crunch! Also works to make the sauce slightly thicker when combined. 🙂
This was the most delicious recipe for shrimp that I had ever used! The charred pieces were the best part! I was hesitant about using so much soy sauce because its taste can be somewhat overpowering. Luckily I didn’t have that issue and will utilize this as a staple in my meal prep. Thank you!
It’s one of my favorites too! You’re absolutely welcome and I’m happy you found a new staple. About the soy sauce, It’s all about balancing flavors which I try to do with everything on the blog. 🙂
Attempted this one tonight. I am not much of a cook so I don’t think I got the searing of the shrimp quite right, but the flavor was still good. Will keep practicing. My family seemed to like it ok and made suggestions that I see others have made reading the comments. Will give them a try. I really liked how simple it was. I think part of my issues was just not getting the pan hot enough. Will definitely try to make sure it is hot enough next time. Thanks for a great recipe!
You’re welcome, Shana! A hot pan will definitely help. You need it hot enough to caramelize the leftover marinade on the shrimp before overcooking the shrimp. Letting the shrimp rest instead of stirring it around while it cooks gives it more chance for it and the pan to char up. I haven’t tried this on a non-stick pan, only cast iron though so that might be an issue if you used non-stick. The more stuff that caramelizes and sticks on, the more stuff to have to rub the shrimp into to ‘blacken’ it, if that makes any sense. It’s not really any kind of pro cooking method that I’m aware of, just something I made up in the kitchen for every day cooking.
This recipe was absolutely amazing! I will definitely be making this again! Thank you so much for sharing!
Great to hear it, Ashley! Thanks for letting me know you loved it :))
This was delicious. I did add maybe a tablespoon of oil to the marinade. I’ll be making this often.
Thank you, Wendy! I’m happy you found a staple.
I made this last night with bell peppers and brown rice and it was a hit! This is going into the rotation! Thank you!!
Did you sear the bell peppers in the same pan? Blackened bell peppers are so great! You’re very welcome, Jessica and thanks for letting me know 🙂
This recipe is poorly written. You could explain how you got the nice sear on your shrimp like you did in your pictures and what type of skillet you used. My shrimp did not come out looking yours did in the picture at all. Did you use any oil when you were searing the shrimp?
Heya MC. You can find the explanation on how to get the nice sear in line 4 of the instructions:
“Using tongs, rub the shrimp into the caramelized bits on the bottom of the pan”
When your pan gets nice and hot, the honey will caramelize a little on the bottom of the pan. Rubbing the shrimp into these blackened bits will give it that blackened look like the pictures. I tend to go into a more detailed explanation on the technique I use in my blurb before the recipe, so sometimes it’s useful to read that as well. I used a 10″ cast iron skillet like the pictures but you can use any kind of skillet you have available. The size really does not matter. Just be sure not to overcrowd the shrimp while cooking so they don’t end up steaming instead of searing. And rub your shrimp into the caramelized bits! I’ve updated the recipe to include the size of the pan and to mention searing with oil!
How do you eat them – seems like you loose all the good stuff by having to cut open and remove the shell.
I’m rating 4 stars cause it looks beautiful.
Heya, Janet. You can cook them with their shells on as well. A lot of people I know tend to shy away from shrimp with shells on and prefer not to get their hands dirty so I’ve made this with them in mind. I don’t mind it either way. So I guess it all depends on personal preference. But I personally feel that there are some recipes like butter prawns/shrimp where keeping the shell on makes it even better!
Yum yum! This recipe was easy peasy. Oh and very tasty. Thanks!
Most welcome! Thanks for trying it out 🙂
Amazing! Thank you so much! X
Yup yup!
Hey,
It’s the first time I’ve cooked for my girlfriend and properly cooked at all for that matter! I really want to try this because I know we will both love it! I was just wondering what else would you eat this with? A side dish maybe? Thank you.
Heya, Cammy! Some veggies should on that plate with it for sure. It’s always good practice to balance out your proteins with some veggies. Asparagus, green beans, broccoli or zucchini will work fine. I have a few asparagus and green bean recipes under the vegetarian category if you want to try some of them. And maybe some garlic bread to get you started?
Hi Farah, looking forward to trying this yummy dish. I’ve never cooked shrimp before. Can you tell me is this precooked shrimp or raw shrimp? Thank you!
Heya Annie! Oh, I never thought to specify that it’s raw for beginner shrimp cooks! It’s raw shrimp in the recipe. Shrimp by itself doesn’t need a long time to cook and can overcook easily, so you will very rarely need to cook pre-cooked shrimp again! You’ll know you overcooked shrimp when they start shrinking. Hope this helps.
This was going to be my exact question! Living in Oklahoma, we have our shrimp flown in and occasionally we get raw shrimp at the local grocery store. Thanks for answering it!
I can’t wait to try this for dinner or on a salad for lunch!
Well I’m glad you found an answer in the comments! I’m really glad they’re around to help folks 🙂 I never thought to include it on a salad. What a great idea!