Five ingredients and 20 minutes are all it takes to enjoy this honey garlic chicken with the much-loved sauce that won over kitchens everywhere.
Today we’re making some delicious, honey garlic chicken. With the same, much-loved flavor profile of honey garlic shrimp and honey garlic salmon, we get to enjoy everyone’s favorite sauce with boneless, skinless chicken breasts or thighs. It’s an addictive sauce with a sticky, sweet and savory glaze that works great with almost every kind of protein.
It’s simple to cook, quick and easy, but so rewarding. And it’s 20-25 minutes (depending on the thickness of your chicken) from start to finish without sacrificing any flavor. If you’re in the mood for something with even more flavor, try this honey garlic butter chicken recipe which uses this recipe as a base.
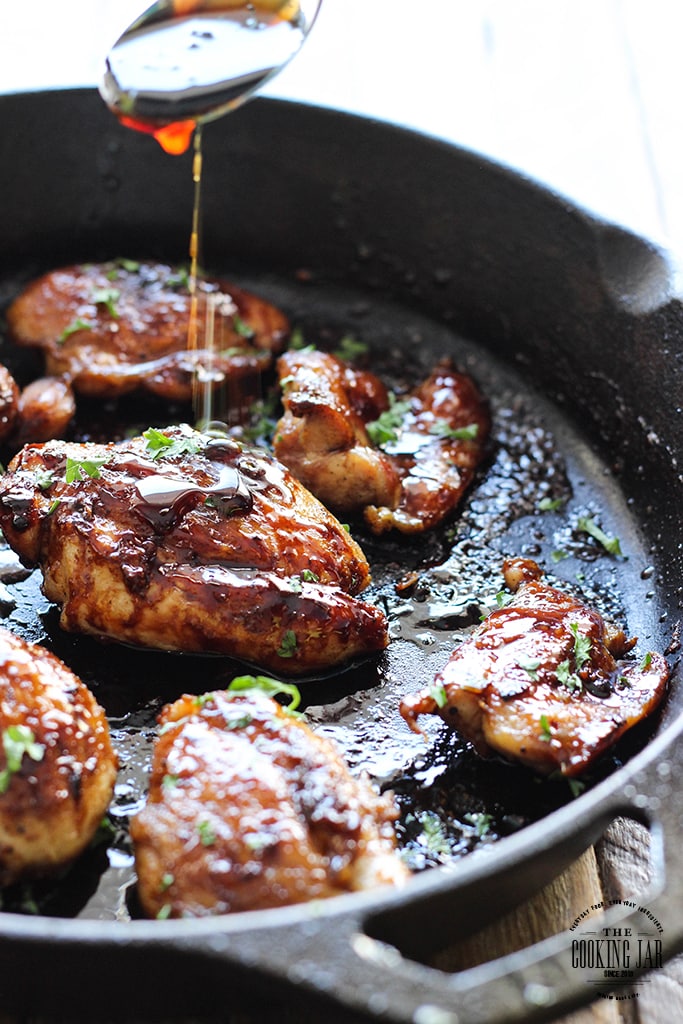
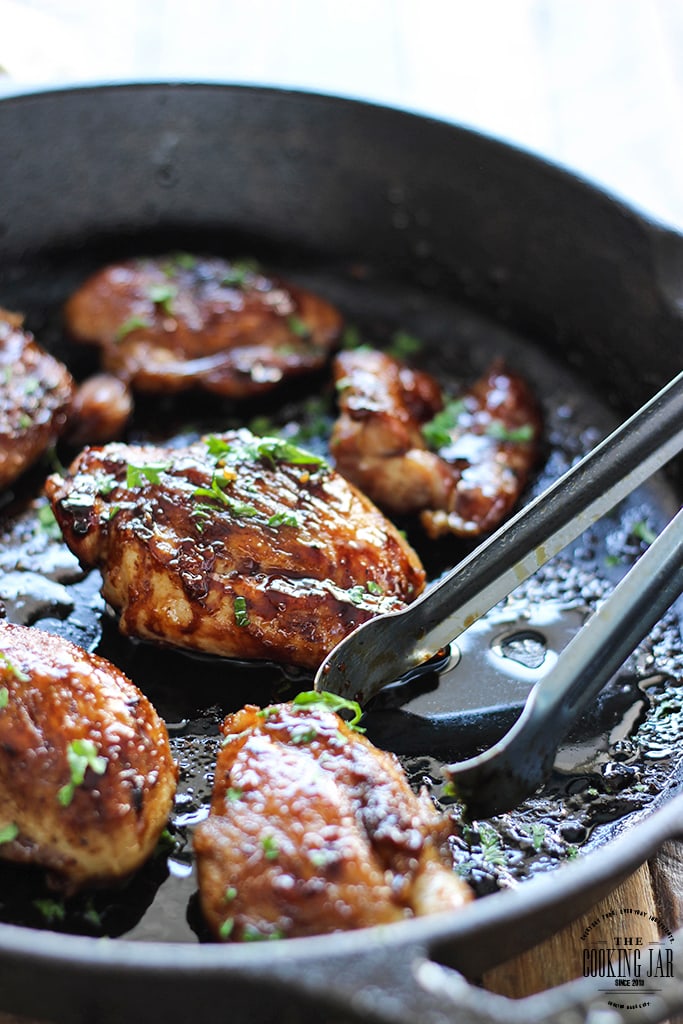
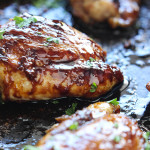
Don’t worry about all the shiny stuff on the pan that looks like oil. It’s actually the sauce. Loads and loads of sauce! This is the stuff that’ll give your chicken that wonderful glaze. I used boneless, skinless chicken thighs because I feel they are juicier but if you prefer chicken breasts, this will work too.
It’s a great answer for quick weeknight dinners. Serve with a side of rice or mashed potatoes with some greens on the side like green beans, broccoli, or asparagus. There are plenty of ways to enjoy this. Let’s start cooking!
How To Make Honey Garlic Chicken (1 Min Video)
What You Need For Honey Garlic Chicken
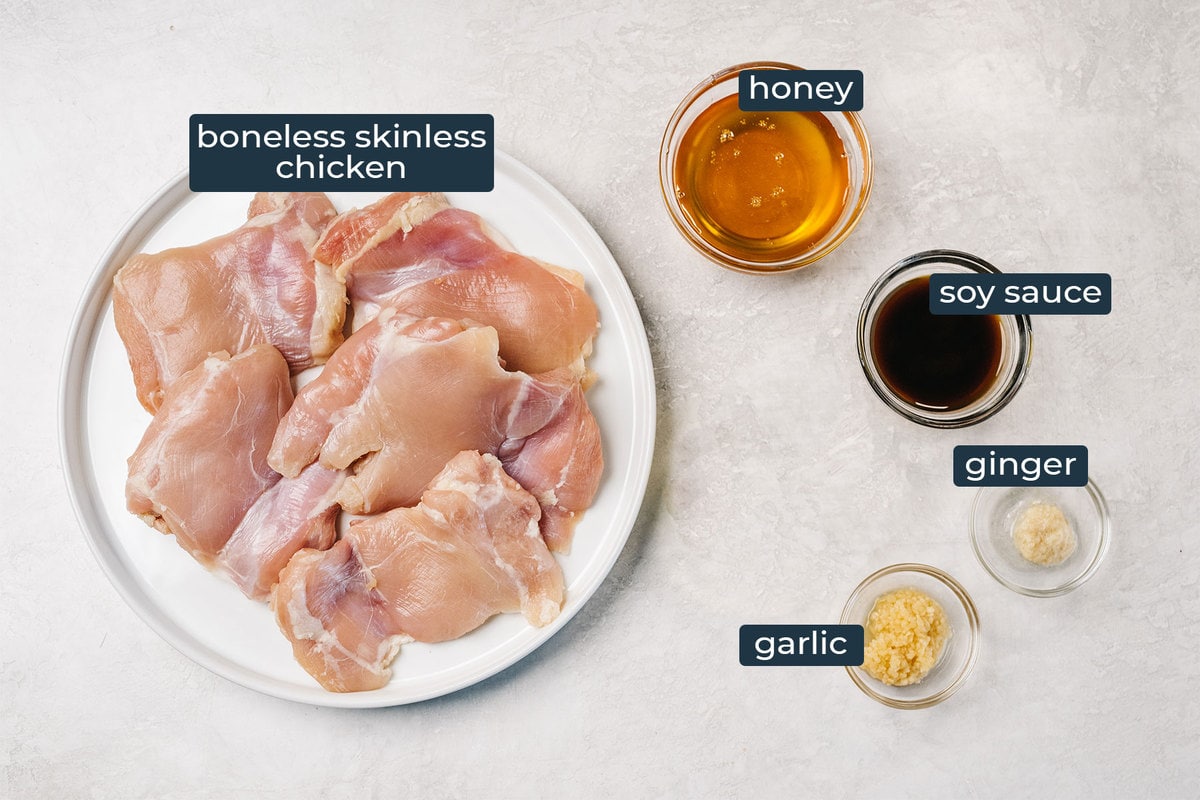
This one is SO simple and I wasn’t lying when I said you only need five ingredients. You can use either boneless, skinless chicken breasts or chicken thighs. Both regular soy sauce and low sodium soy sauce will work.
And if you don’t have fresh garlic and ginger on hand, feel free to substitute with garlic powder and powdered ginger. Ginger gives the sauce a warm flavor but if you’re not a fan, you can absolutely leave it out too. It will not break the recipe. And if you want to build on this recipe for more flavor, try adding in a splash of lime juice or a few dashes of red pepper flakes.
HONEY GARLIC CHICKEN RECIPE TIPS
One pound of boneless, skinless chicken thighs turned out to be about four thighs for me. So if you sub with chicken breasts, go for one pound’s worth. Cut the thighs in half to make them cook quicker and cook them in two batches so you’re not overcrowding the pan. This also makes sure the chicken sears properly instead of steaming.
If your breasts are slightly on the thicker side, it might be worth it to cut it up lengthwise as well, to cut that thickness in half so it’ll cook faster and more evenly. Also make sure the thighs/breasts are dry before we cook them so they brown up nicer (and so you don’t get attacked with angry, spitting oil).
Start heating up the pan over medium-high heat in a 10″ skillet. I used about two tablespoons of oil, just enough to coat the bottom of the pan. Since there isn’t any skin on the chicken to render fat, we’ll be relying solely on the oil you add to the pan to sear them.
It should take about 3-4 minutes to sear and cook each side, depending on the size of each chicken piece. The smaller pieces will end up crispier than the bigger ones. Keep an eye on them and remove them from the pan earlier if needed. After the first side of the chicken is done, reduce the heat to medium to stop the pan from smoking before flipping the chicken over. You will be cooking from medium to medium-low heat from here on out.
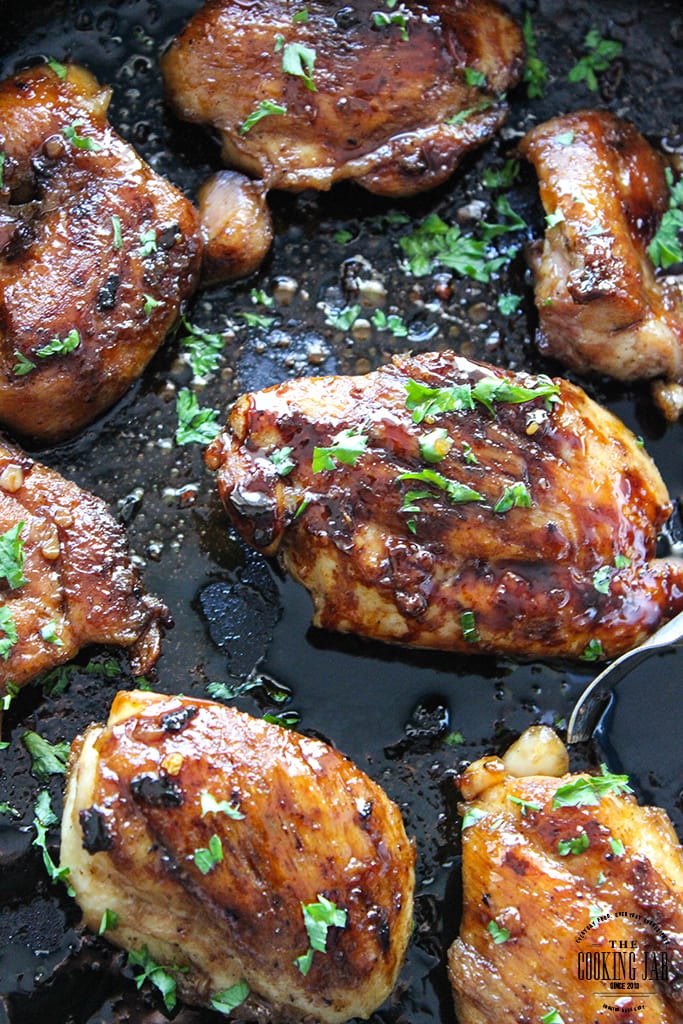
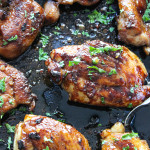
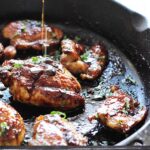
Even though we patted the chicken dry with paper towels earlier, there might still be some angry spitting from the oil. So it’s always worth it to invest in a splatter guard. And wear an apron! Once it’s all cooked, drain the chicken on some paper towels and remove any excess oil from the pan, leaving just a little to saute the aromatics. Saute the garlic and ginger until fragrant, add the chicken back to the pan, and pour in the honey and soy sauce mixture.
TIP: Make sure to keep the heat on medium-low as boiling the sauce too fast will burn and harden it into a sticky mess. And even though sticky sauce sounds great, burning it changes the sweetness of the honey to bitterness. It’s not too tasty.
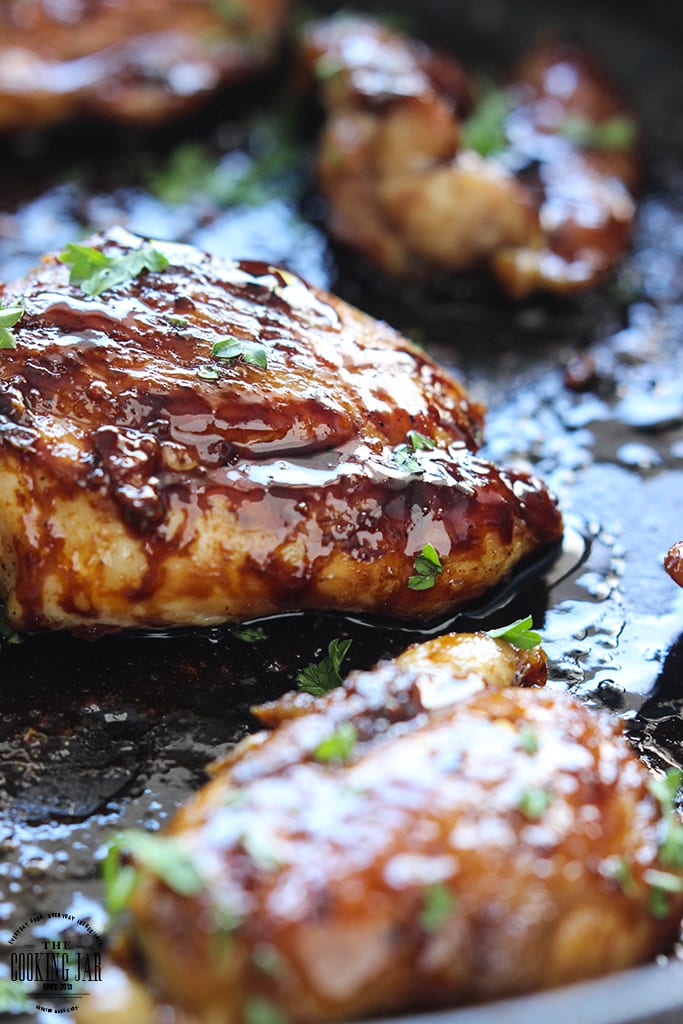
Flip the chicken in the sauce to coat both sides and once the sauce has reduced and we’re done. That’s it! Go enjoy your glazed chicken and brag about how you’re a cooking expert. There’s no need to tell anyone it was only five ingredients! 😉
Customize It!
- Add more flavor – Add some heat with a few dashes of red pepper flakes. You can cut the sweetness of the sauce with some apple cider vinegar or a drizzle of lime juice. For a smoky flavor, do a finishing drizzle with sesame oil or sprinkle with toasted sesame seeds.
MORE HONEY GARLIC RECIPES TO TRY
- Honey Garlic Butter Chicken
- Honey Garlic Shrimp
- Crispy Honey Garlic Chicken
- Honey Garlic Salmon
- Slow Cooker Honey Garlic Chicken
- Air Fryer Honey Garlic Salmon
Did you make this recipe? Rate it!
♡ If you liked this recipe, giving it a star rating ★★★★★ in the comments below really helps! For more recipes, subscribe to my newsletter or follow me on Facebook, Instagram and Pinterest.
Honey Garlic Chicken
- Total Time: 20 mins
- Yield: 4 1x
Description
Five ingredients and 20 minutes are all it takes to enjoy this honey garlic chicken with the much-loved sauce that won over kitchens everywhere.
Ingredients
- 1 lb. boneless, skinless chicken thighs/breasts
- 2 medium cloves garlic / 2 teaspoons garlic, minced
- 1/2 teaspoon fresh ginger, minced (optional)
- 4 tablespoons honey
- 2 tablespoons soy sauce
- Fresh parsley / green onions, chopped (optional)
Instructions
- Combine the honey and soy sauce and set aside.
- Over medium-high heat in a 10″ skillet, pan-sear the chicken in some oil. Reduce heat to medium after searing the first side.
- Cook them on both sides in batches until browned, about 3-4 minutes per side, or until the center is no longer pink and a meat thermometer reads 165°F. Drain chicken on paper towels and remove most of the oil from the pan.
- Add garlic and ginger (optional) and saute for 30 seconds until fragrant. Add the chicken back into the pan.
- Pour in the honey and soy sauce mixture and bring to a gentle boil over medium-low heat until the sauce is reduced. Flip the chicken to coat in the sauce fully.
- Dish and serve hot.
- Enjoy!
Notes
- Add more flavor – Add some heat with a few dashes of red pepper flakes. You can cut the sweetness of the sauce with some apple cider vinegar or a drizzle of lime juice. For a smoky flavor, do a finishing drizzle with sesame oil or sprinkle with toasted sesame seeds.
- Scroll up to RECIPE TIPS for more useful tips, suggestions and ingredient substitutions.
- Prep Time: 5 mins
- Cook Time: 15 mins


Comments & Reviews
I made this recipe and it was very GOOD!
So glad you like it, Shaleena! And THANK YOU for coming back and giving it a star rating. Every bit helps 🙂
I reeeeeally wish I had taken your advice about cutting the chicken breasts if they are too thick. I was too impatient and tossed them in as-is; that made the cooking process a much bigger ordeal than it needed to be, as they cooked very unevenly. Don’t be me, folks. Flavor was still awesome though! Can’t go wrong with garlic, ginger, honey, and soy sauce.
Live and learn! You could also pre-cut the chicken into bite-size pieces and treat it like a stir-fry for an even quicker cooking process.
Great recipe, in the end, I put a dash of salt and black pepper to make it more flavourful
Appreciate you weighing in, Julio. I avoided adding in salt to the recipe because I borrowed the sodium from the soy sauce but feel free to add more salt if needed, everyone’s tastes are different 🙂
Made this last night and we loved it. It was quick and easy to make.
Thanks for trying it out and weighing in, Amy!
This recipe was simple, easy and delicious, also have ingredients that I have already on hand only I used ground ginger as I find regular ginger to be a bit strong for my taste… I found the sauce to be too watery :/ I am thinking of maybe next time to add some cornstarch to thicken the sauce?
I’ve yet to try ground ginger but I assume it’ll be more concentrated than the fresh stuff. That usually is the case with herbs/aromatics. And you’re spot on. Add in some cornstarch with cold water to make a cornstarch slurry, then add it to the sauce and wait till it boils and thickens. Once the whiteness of the cornstarch fades into the sauce, it’ll be as thick as that slurry can make it. Add more if needed, that’s how I do it.
Made this last night. Everyone loved it!
Thanks for trying it out and letting me know, Barbara!
Oh yeah, this was ridiculously easy and so tasty. Thank you for sharing! I used a raw avocado honey and Braggs Aminos. This one is definitely a favorite in my family. They ate the WHOLE thing. Lol! I used as a side, leek tops sauteed with Braggs liquid aminos and grated ginger.
I’ve never heard of raw avocado honey before but I’ve definitely heard of Aminos. I’m glad it was a hit with your family too!
Simply frantastic! You can’t go wrong with 5 ingredients. I have picky teen and she smelled the chicken, stabbed said chicken with fork, and promptly inhaled it before anyone was ready to dish up and then there was one. One delish piece left…all I can say it’s a good thing she wasn’t brandishing a knife since she stabbed her dad’s hand with her fork! Awesome recipe definitely will be making it again thank you!?
Haha, that’s hilarious!!! Both the story and the way you tell it. I love it! 🙂
Hello,
My name is Tonja and honestly, I don’t write reviews. But, I really had to tell you about my experience with your recipe for the Honey Garlic Chicken Skillet!!!
My husband and I are in our 50’s, and I was just looking a DIFFERENT chicken recipe. I saw this and knew that my husband would like it. But, for me … well I had to give a bit of a kick and my own lil edge. lol
So I took honey, garlic, salt & pepper, ground ginger, and my own lil kick of chili powder. I put all of it and the chicken into a zip lock bag and left it to marinate in the fridge overnight.
And then I started cooking it up tonight, then added the soy sauce to the chicken while cooking.
I gave my husband a small bite as the chicken was cooling off, and while I was cooking up green beans in the left over sauce in the pan. My husband followed me back into to the kitchen to get another bite.
Which he knows is a NO NO!!! In My Kitchen While I’m Cooking!!! LOL
So, thank you for another idea on what to do with chicken. Also, we were trying to figure out what else this would be good with … and we decided on pork chops!!! So, if I give it a go with the pork chops we’ll drop a line and letcha know how it goes.
Thank You, OH THANK YOU,
Tonja & Charles
You’re very welcome, Tonja. Chili powder would work great to add some kick, as you say. So would some red pepper flakes or cayenne. Or if you want it a little smoky, some smoked paprika.
I can also relate very well with wanting the kitchen all to yourself while cooking. I tend to move around like a hurricane and I don’t want anyone or anything in my way!
I am a vegetarian that has never grilled chicken before.
My meat eater pops is staying with me for the summer and I was looking for a simple how-to grill chicken in my cast iron skillet.
This recipe is the GOLDEN TICKET! Winner Winner – Chicken Dinner!
I paired this with a dee-lish Vegetarian Farro Zucchini Skillet recipe and he absolutely loved it! Thank you for sharing!!
Thanks so much, Carol! I swear I replied to you but it must have gotten lost in a backup restore or something. My blog was undergoing lots of changes around May, June and July. Because I LOVE this comment! 🙂
Great and easy recipe. Perfect for summer nights when you don’t want to use your oven. The sauce was delicious, and my husband enjoyed it too!
Thanks for trying it out, Erin!
Have just tried this really enjoyed it quick and straight forward , not to many ingredients which I like . Noticed on some other people’s comments that cornstarch was used to thicken . Could I use just household flour to thicken mix
I don’t think it will work as well as cornstarch. Cornstarch is usually used for skillet sauces to thicken them, you only need a little. Flour might give it a floury taste which cornstarch will not.
I made this yesterday and the flavor is wonderful.
I pan seared whole thighs and cooked then sous vide at 165°F for 2 hours then finished them in a skillet with sauce.
Great sauce recipe. Thank you.
You’re very welcome Bkhuna!
Great recipe! Easy and delicious!
Thank you, MarLo! I’m so glad you enjoyed it 🙂
Would love to make this but I don’t have fresh ginger. Can I use powdered? If yes, how much do you think that I should use?
Yes you can although use very little of the powdered stuff. They’re generally more potent than fresh. I would say 1/8 a teaspoon at most.